Nothing compares to homemade bone broth! And I feel like I’ve unlocked the secret to making the BEST chicken bone broth of my life. I’ve been using this particular method for a couple years now, and I won’t go back to using any other because it so good! So if you find that your homemade bone broth is lacking in flavor, or if your bone broth doesn’t gel nicely once cooled… this method is for you!
Yes, there are chicken feet involved.
No, you don’t have to use them… but I hope to convince you otherwise!
The terms broth and stock have been debated for years. Traditionally a “broth” is made with meat and some bones and only cooks for a couple hours. Broth tends to be really flavorful and lighter feeling. A “stock” is made from bones and some meat, is cooked low and slow for a long time. Stock often ends up cloudy and with a richer mouth-feel from the collagen that was extracted. And “bone broth” is the trendy name for stock!
A broth has great flavor, a stock/bone broth has great nutrients. I like to combine the two to make one super broth that is loaded with both flavor and nutrients!
You are saving all your used chicken bones, right? You aren’t just tossing that nutritional-gold are you? Any bones can be used to make broth- leftover rotisserie chicken bones, wings, drumstick bones, anything and everything!
I used to make bone broth using only the used chicken bones and carcasses I had saved. I’d squirrel them away in the freezer until I had enough, then pull them out to make homemade bone broth. It was always just okay tasting. Since there was little to no meat on those bones, it lacked flavor.
This hybrid method still allows you to save and use those precious bones, but has a lot more flavor from the addition of fresh chicken meat!
I use an Instant Pot for making homemade bone broth, and I think it’s an incredible tool for this job. In fact, broth is the ONLY thing I use my Instant Pot for and I absolutely love it for that- it has transformed my broth-making! I have the 6-quart size, but I’d love to upgrade to the 8-quart model in order to make bigger batches of broth!
Buy an Instant Pot here!
Really amazing bone broth traditionally takes at least 24 hours of simmering, and I am unwilling to leave a pot cooking on the stove overnight. It just makes me too nervous! The Instant Pot can accomplish the same thing in a matter of hours.
While the slow cooker is also an option, I’ve reduced the use of mine over the last couple years after reports came out that the ceramic insert can contain lead that can leach out into your food. I much prefer the Instant Pot’s stainless steel insert, ease of use, fast cooking time, and great finished product.
You are welcome to take this technique for hybrid broth and adapt it to the stove-top, slow cooker, or traditional pressure cooker!
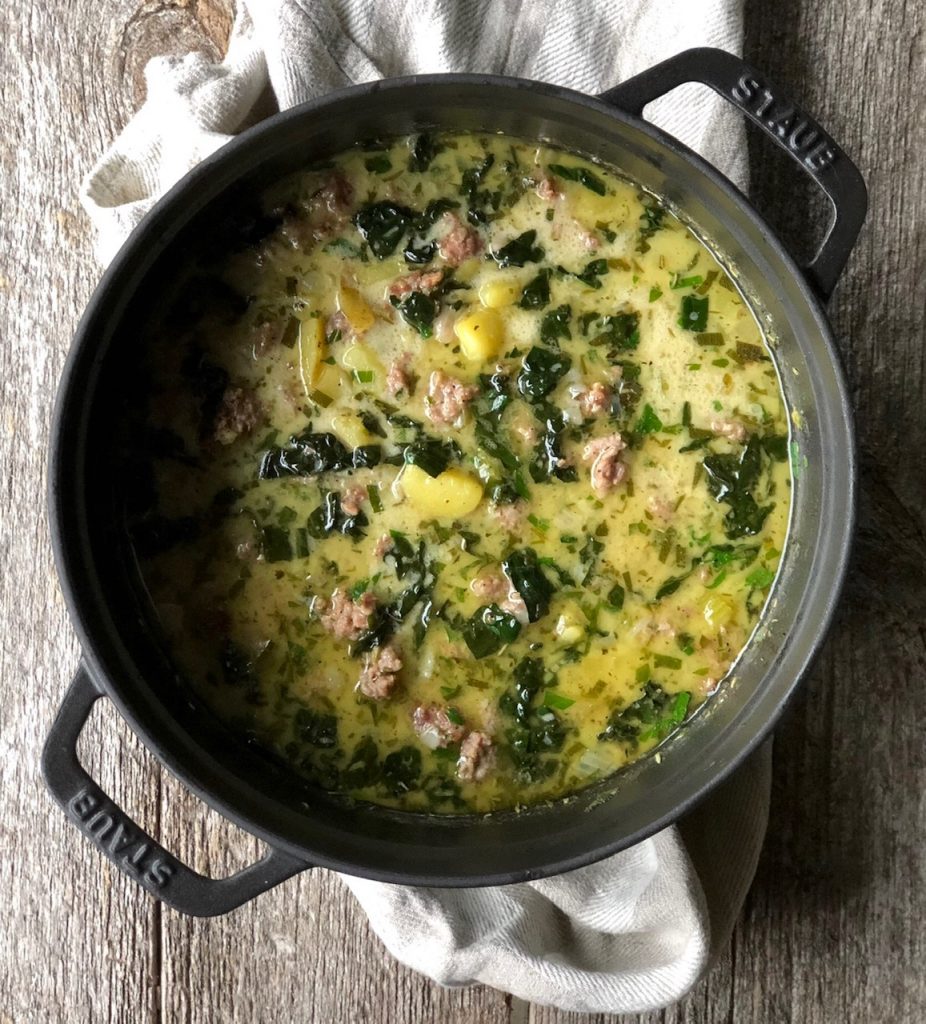
The first step is to make a great tasting FLAVORFUL broth, which we’ll do by cooking chicken and veggies together in the Instant Pot.
To the Instant Pot, add:
1-2 large carrots, cut into large pieces
2-3 celery stalks, cut into large pieces
1 large yellow onion, skin left on, and quartered
2 cloves of garlic
5-6 sprigs of fresh parsley
2 lbs bone-in, skin-on chicken thighs
Optional: I often add some dried mushroom pieces for extra flavor. You can add whatever else you like here… rosemary, parsnips, leeks, etc. I like to keep the flavor classic, so I only add the above mentioned veggies.
I like to use bone-in, skin-on chicken thighs because they are affordable. You can use a whole cut-up chicken, or any parts that you like as long as they have meat, skin, and bones included.
Fill the Instant Pot with water until all the ingredients are JUST covered. Adding more water will get you a watery broth that doesn’t gel.
Cook on high pressure for 30 minutes. This is a good amount of time to extract a lot of the flavor from the chicken, but not totally annihilate it so that it doesn’t have any flavor left.
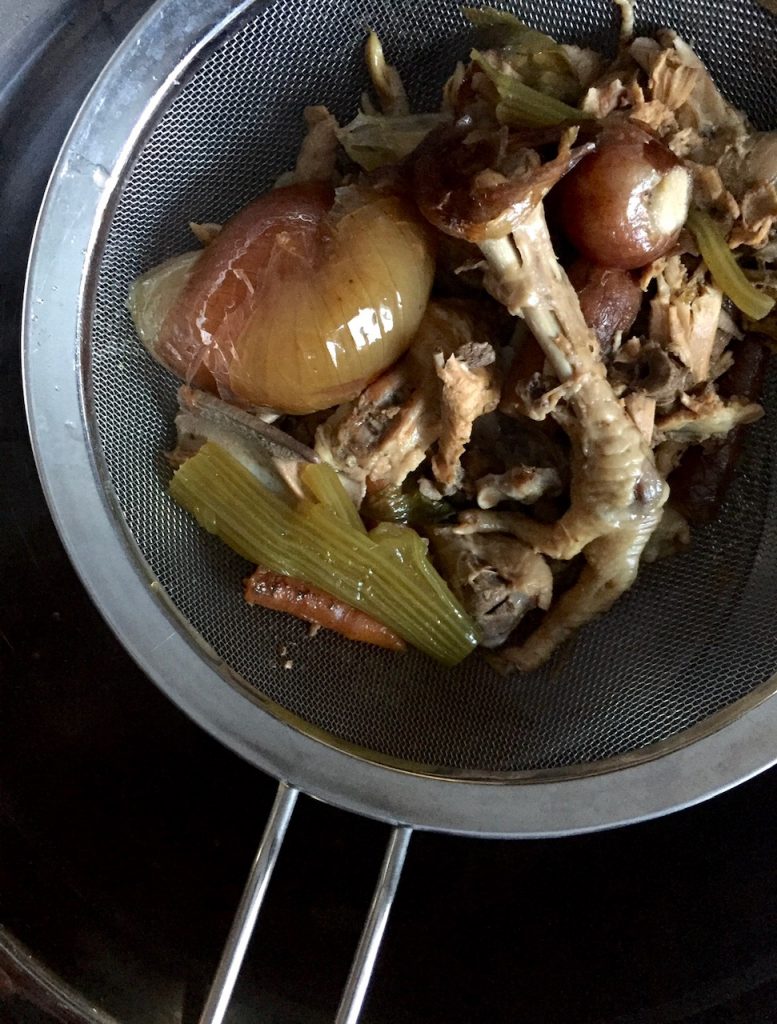
Once the Instant Pot is depressurized, place a colander over a large bowl and transfer all the meat, veggies, and broth into it, allowing the liquid gold to collect in the bowl below.
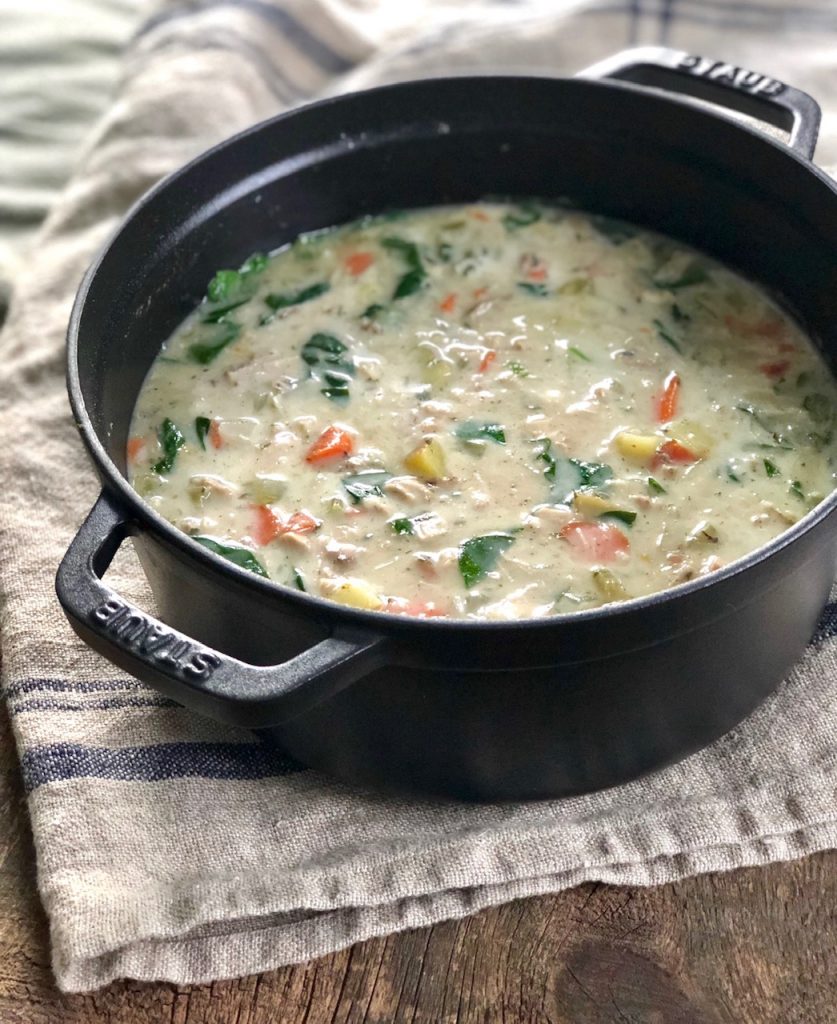
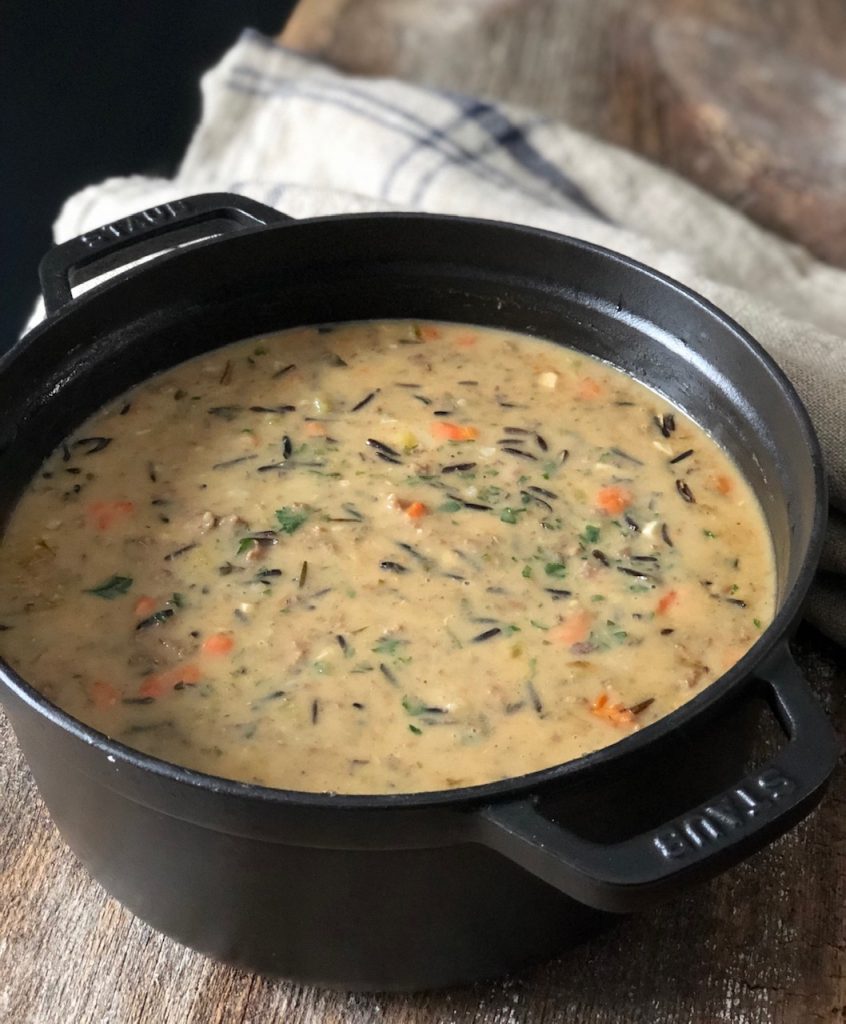
Remove the chicken meat from all the bones; place the bones back into the Instant Pot, and place the chicken meat into a separate container- you can use this for whatever you like: chicken soup, chicken salad, chicken nachos…
Now we’ll make the healing and very NUTRIENT-DENSE part of our bone broth!
To the Instant Pot add:
Bones and skin from the chicken you just cooked in Part 1
2 Carcasses worth of bones, skin, and bits you’ve been saving
5-8 chicken feet (to me this is non-negotiable)
Optional veggies, similar to the ones you used in Part 1
Add everything outlined above into your Instant Pot (and no need to wash the pot between Parts and 1 and 2!). This is a great place to use veggie scraps that you’ve been saving in the freezer as well… all those celery tops, onion skins, carrot ends, and herb stalks!
Again, fill the pot with fresh water until the ingredients are JUST covered.
Cook on high pressure for three hours. My Instant Pot is older and doesn’t run this long, so I run a cycle of 120 minutes followed by a cycle of 60 minutes. Once it beeps at me that the first cycle is done, I press the off button, then start it right back again- no need to let it cool or depressurize between cycles if you have to run more than one.
Once Part 2 of bone broth making is done, strain out the bones and veggies, collecting the broth in a large bowl.
The final step in my hybrid homemade bone broth is to combine the two broths. I pour them together, let them cool on the counter for a bit, and then transfer the broth into the fridge to cool overnight.
The following morning is the fun part- seeing how your beautiful broth gelled! Once the broth has cooled, any fat will rise up to the top- please don’t get rid of this! The fat is where so much of the flavor is. Depending on the chicken you used, there may be a lot or a little fat, so feel free to scrape some of it off if it seems excessive… but please don’t get rid of it all!
I ladle the broth into my favorite reusable freezer containers– they’re reusable for years, BPA-free, won’t stain or hold odors, are great at preventing freezer burn, and very inexpensive at less than $15 for 24. Buy them here! I like both the 32-ounce and 16-ounce size for broth.
I always, always make sure to have homemade bone broth in the freezer.
If you’d like to see me make this on video, I have a saved story on my Instagram highlight reel where I share the whole process! Find my Instagram page here!
Do it, please just trust me. I won’t make homemade bone broth without chicken feet anymore! First of all, they have an amazing amount of collagen to give up, and this will give your broth a beautiful gel. Second, this is a fantastic way to make eating chicken more sustainable and honor the life of the animal by using all its parts, even those thought of as undesirable.
Do they look kinda gross? Yeah, they’re feet!
I’d recommend you get over it and just try them.")
Sourcing Chicken Feet
I find chicken feet in the frozen section at my local natural foods store for not much more than a song. If yours doesn’t carry them, you could always ask the butcher, as they are often very accommodating and can likely get some for you. A good place to check is your local Mexican grocery store- they usually have them. If you still can’t find any, you can often order them online from White Oak Pastures, and probably other places as well.
Do You Add Salt?
I don’t add salt to my broth when I am making it, as I prefer to adjust the salt level when I am actually cooking with it. I like having this standard as it keeps things simple, easy, and consistent for me.
Do You Add Vinegar?
I don’t add vinegar or any type of acid to my bone broth. Why? I’ve read enough literature to tell me that it doesn’t actually do anything or help pull more nutrients out of the bones… plus, I can’t stand the taste of it.
Does Quality of Chicken Matter for Broth?
I hold a pretty high standard for the food I chose to put in my body. When making something I intend to be healing and full of nutrients, using the highest quality chicken is important. Especially because broth is cooked for so long, any toxins contained in the chicken have the potential to come out in the broth. Organic and pasture-raised chicken is best for broth-making.
Happy homemade bone broth-making!
Want more from the homestead?


This post may contain affiliate links, which means that if you click through them and end up purchasing an item (any item, not necessarily the one I recommended even!) I may receive monetary or other compensation. The price you pay is unaffected by using this link, and buying stuff you were going to get anyways through an affiliate link is a great way to support your favorite blogger and fellow homesteader! Thanks!

The post Homemade Bone Broth & Stock Hybrid Recipe appeared first on Whole-Fed Homestead.
Yes, there are chicken feet involved.
No, you don’t have to use them… but I hope to convince you otherwise!
The terms broth and stock have been debated for years. Traditionally a “broth” is made with meat and some bones and only cooks for a couple hours. Broth tends to be really flavorful and lighter feeling. A “stock” is made from bones and some meat, is cooked low and slow for a long time. Stock often ends up cloudy and with a richer mouth-feel from the collagen that was extracted. And “bone broth” is the trendy name for stock!
A broth has great flavor, a stock/bone broth has great nutrients. I like to combine the two to make one super broth that is loaded with both flavor and nutrients!
Save Those Bones!
You are saving all your used chicken bones, right? You aren’t just tossing that nutritional-gold are you? Any bones can be used to make broth- leftover rotisserie chicken bones, wings, drumstick bones, anything and everything!
I used to make bone broth using only the used chicken bones and carcasses I had saved. I’d squirrel them away in the freezer until I had enough, then pull them out to make homemade bone broth. It was always just okay tasting. Since there was little to no meat on those bones, it lacked flavor.
This hybrid method still allows you to save and use those precious bones, but has a lot more flavor from the addition of fresh chicken meat!
Instant Pot, Stock Pot, or Slow Cooker?
I use an Instant Pot for making homemade bone broth, and I think it’s an incredible tool for this job. In fact, broth is the ONLY thing I use my Instant Pot for and I absolutely love it for that- it has transformed my broth-making! I have the 6-quart size, but I’d love to upgrade to the 8-quart model in order to make bigger batches of broth!
Buy an Instant Pot here!
Really amazing bone broth traditionally takes at least 24 hours of simmering, and I am unwilling to leave a pot cooking on the stove overnight. It just makes me too nervous! The Instant Pot can accomplish the same thing in a matter of hours.
While the slow cooker is also an option, I’ve reduced the use of mine over the last couple years after reports came out that the ceramic insert can contain lead that can leach out into your food. I much prefer the Instant Pot’s stainless steel insert, ease of use, fast cooking time, and great finished product.
You are welcome to take this technique for hybrid broth and adapt it to the stove-top, slow cooker, or traditional pressure cooker!
Homemade Bone Broth Part 1
The first step is to make a great tasting FLAVORFUL broth, which we’ll do by cooking chicken and veggies together in the Instant Pot.
To the Instant Pot, add:
1-2 large carrots, cut into large pieces
2-3 celery stalks, cut into large pieces
1 large yellow onion, skin left on, and quartered
2 cloves of garlic
5-6 sprigs of fresh parsley
2 lbs bone-in, skin-on chicken thighs
Optional: I often add some dried mushroom pieces for extra flavor. You can add whatever else you like here… rosemary, parsnips, leeks, etc. I like to keep the flavor classic, so I only add the above mentioned veggies.
I like to use bone-in, skin-on chicken thighs because they are affordable. You can use a whole cut-up chicken, or any parts that you like as long as they have meat, skin, and bones included.
Fill the Instant Pot with water until all the ingredients are JUST covered. Adding more water will get you a watery broth that doesn’t gel.
Cook on high pressure for 30 minutes. This is a good amount of time to extract a lot of the flavor from the chicken, but not totally annihilate it so that it doesn’t have any flavor left.
Once the Instant Pot is depressurized, place a colander over a large bowl and transfer all the meat, veggies, and broth into it, allowing the liquid gold to collect in the bowl below.
Remove the chicken meat from all the bones; place the bones back into the Instant Pot, and place the chicken meat into a separate container- you can use this for whatever you like: chicken soup, chicken salad, chicken nachos…
Homemade Bone Broth Part 2
Now we’ll make the healing and very NUTRIENT-DENSE part of our bone broth!
To the Instant Pot add:
Bones and skin from the chicken you just cooked in Part 1
2 Carcasses worth of bones, skin, and bits you’ve been saving
5-8 chicken feet (to me this is non-negotiable)
Optional veggies, similar to the ones you used in Part 1
Add everything outlined above into your Instant Pot (and no need to wash the pot between Parts and 1 and 2!). This is a great place to use veggie scraps that you’ve been saving in the freezer as well… all those celery tops, onion skins, carrot ends, and herb stalks!
Again, fill the pot with fresh water until the ingredients are JUST covered.
Cook on high pressure for three hours. My Instant Pot is older and doesn’t run this long, so I run a cycle of 120 minutes followed by a cycle of 60 minutes. Once it beeps at me that the first cycle is done, I press the off button, then start it right back again- no need to let it cool or depressurize between cycles if you have to run more than one.
Once Part 2 of bone broth making is done, strain out the bones and veggies, collecting the broth in a large bowl.
Homemade Bone Broth Part 3
The final step in my hybrid homemade bone broth is to combine the two broths. I pour them together, let them cool on the counter for a bit, and then transfer the broth into the fridge to cool overnight.
The following morning is the fun part- seeing how your beautiful broth gelled! Once the broth has cooled, any fat will rise up to the top- please don’t get rid of this! The fat is where so much of the flavor is. Depending on the chicken you used, there may be a lot or a little fat, so feel free to scrape some of it off if it seems excessive… but please don’t get rid of it all!
I ladle the broth into my favorite reusable freezer containers– they’re reusable for years, BPA-free, won’t stain or hold odors, are great at preventing freezer burn, and very inexpensive at less than $15 for 24. Buy them here! I like both the 32-ounce and 16-ounce size for broth.
I always, always make sure to have homemade bone broth in the freezer.
If you’d like to see me make this on video, I have a saved story on my Instagram highlight reel where I share the whole process! Find my Instagram page here!
About Chicken Feet
Do it, please just trust me. I won’t make homemade bone broth without chicken feet anymore! First of all, they have an amazing amount of collagen to give up, and this will give your broth a beautiful gel. Second, this is a fantastic way to make eating chicken more sustainable and honor the life of the animal by using all its parts, even those thought of as undesirable.
Do they look kinda gross? Yeah, they’re feet!
I’d recommend you get over it and just try them.
Sourcing Chicken Feet
I find chicken feet in the frozen section at my local natural foods store for not much more than a song. If yours doesn’t carry them, you could always ask the butcher, as they are often very accommodating and can likely get some for you. A good place to check is your local Mexican grocery store- they usually have them. If you still can’t find any, you can often order them online from White Oak Pastures, and probably other places as well.
Homemade Bone Broth FAQ
Do You Add Salt?
I don’t add salt to my broth when I am making it, as I prefer to adjust the salt level when I am actually cooking with it. I like having this standard as it keeps things simple, easy, and consistent for me.
Do You Add Vinegar?
I don’t add vinegar or any type of acid to my bone broth. Why? I’ve read enough literature to tell me that it doesn’t actually do anything or help pull more nutrients out of the bones… plus, I can’t stand the taste of it.
Does Quality of Chicken Matter for Broth?
I hold a pretty high standard for the food I chose to put in my body. When making something I intend to be healing and full of nutrients, using the highest quality chicken is important. Especially because broth is cooked for so long, any toxins contained in the chicken have the potential to come out in the broth. Organic and pasture-raised chicken is best for broth-making.
Happy homemade bone broth-making!
Want more from the homestead?
This post may contain affiliate links, which means that if you click through them and end up purchasing an item (any item, not necessarily the one I recommended even!) I may receive monetary or other compensation. The price you pay is unaffected by using this link, and buying stuff you were going to get anyways through an affiliate link is a great way to support your favorite blogger and fellow homesteader! Thanks!
The post Homemade Bone Broth & Stock Hybrid Recipe appeared first on Whole-Fed Homestead.